
Large-scale surveying by Matrice 4E
- ldontechservice
- Jul 7, 2025
- 5 min read
[This is an original article from DJI Enterprise Wechat channel. You can read the original article in Chinese by clicking here.]
For large-scale ariel surveying, complex terrain, versatile weather conditions, and thousands of square kilometers of measurement areas put forward extremely high requirements for the endurance of survey equipment, operational efficiency, data management capability and teamwork. Specialitis would recommend large scare drones because of their strong environmental adaptability. It is definitely a good choice, but also an expensive choice with limitation to operation envrionment.
Is it viable for a compact drone to do large-scale ariel surveying? How to efficiently acquire orthographic and tilt photography data?
This year, DJI Matrice 4E was officially released with incredible flight speed up to 21 meters per sec. Matrice 4E is gradually becoming the main model for ariel surveying for areas of tens of square kilometers or even hundreds of square kilometers.

The real world example below shows the work flow of a large-scale mapping project using a M4E.

Step 1: Dividing the Survey Area
When dealing with large-scale survey projects, it's recommended to break the area into smaller, manageable zones. Based on DJI Enterprise Experts recommendation, a 3 km × 3 km grid works well for generally flat regions, while a 2 km × 2 km grid is better for mountainous terrain.
Here’s how it works:
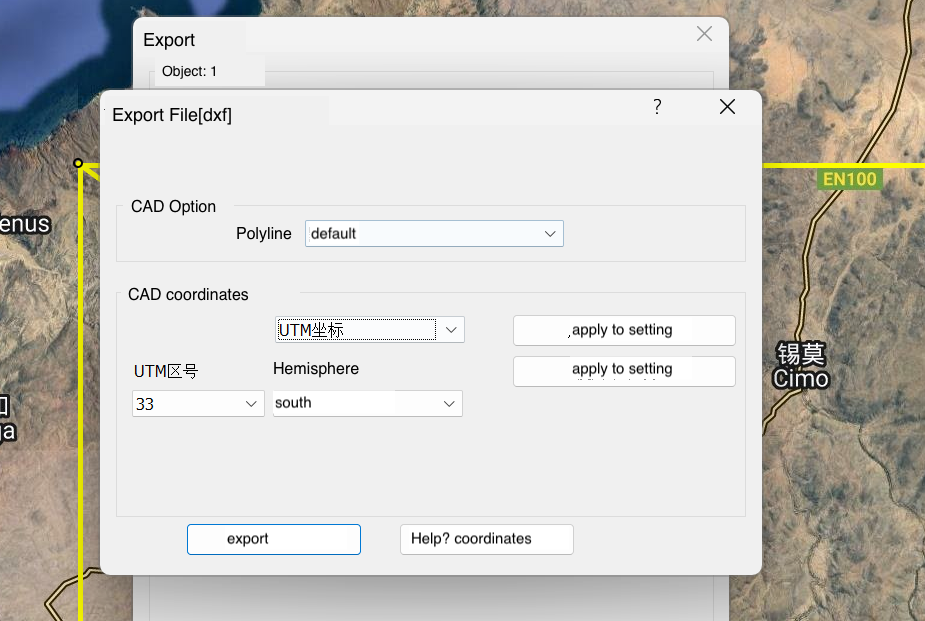
Start by drawing the survey boundary in your GIS software. Once the area is planned out, export the boundary as a DXF file. Then, switch to your CAD software to divide the region into blocks based on your chosen grid size.
This method keeps your data organized and makes fieldwork much smoother—especially when working with drones or managing multiple teams.
Divide the survey area into blocks using a 3 km × 3 km grid In CAD or CASS software. First, draw a standard 3 km × 3 km square, then use array copy and move functions to cover the entire survey area. Next, adjust the grid boundaries to align with the survey boundary lines. Finally, based on the terrain and accessibility, assign specific tasks to the flight teams accordingly.

Export the divided survey boundary from CAD to OvitalMap and save it as a KML file. When splitting the boundary lines in CASS, make sure the total boundary after division covers an area larger than the actual survey region.

Convert the strip map frame lines generated in CAD into polygon survey blocks (or complete this conversion directly within CAD beforehand).

Detailed Steps as following:
Delete the previously created line files, keep only the polygon (area) files, and after verifying that everything is correct, export them as KML format.

Export the divided map as a KML file in GIS software. Then, register a DJI account and launch the free trial version of DJI Flighthub2.

Click to launch DJI Flighthub2 Website Create your organization in Flighthub2.

Go to “Organization” → Open “Map Annotation” → Import the KML file.

screenshot in Flighthub2 to import the KML File Compare the original boundary line with the divided boundary lines. After confirming they are correct, click the boundary line folder to distribute the files.

Open the project settings and copy the access code to share with other teams so they can join the project.

how to add an access code in flighthub2
Step 2: Convert the survey area into flight route in flighthub2
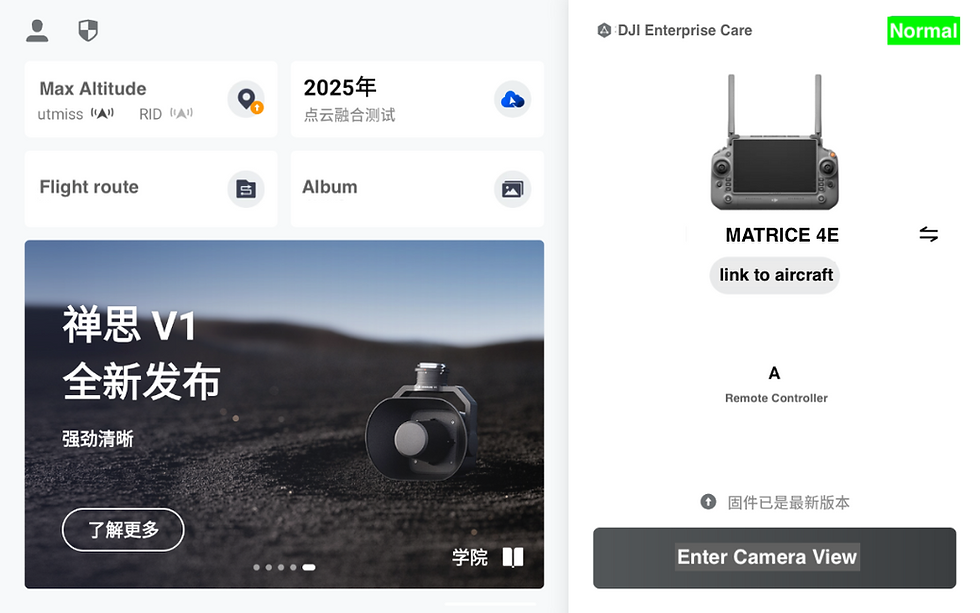
Each team should open the DJI Pilot 2 app on their remote controller and log in to the Flighthub 2 platform.

Tap on the Route Library, select the small survey area polygon, and convert it into a survey area.

Choose the Area route, select the Matrice 4E drone model, rename the mission to "A0-1," and confirm the settings.

Create flight routes with different resolutions, overlap rates, and flight speeds according to the project requirements, and save them. In this page, you can also freely rotate the view and inspect the route and terrain in 3D.

Launch the DJI Pilot 2 app in M4E remote controller and navigate to the "Flight Routes" section to view or manage your planned missions.
Tap on Cloud
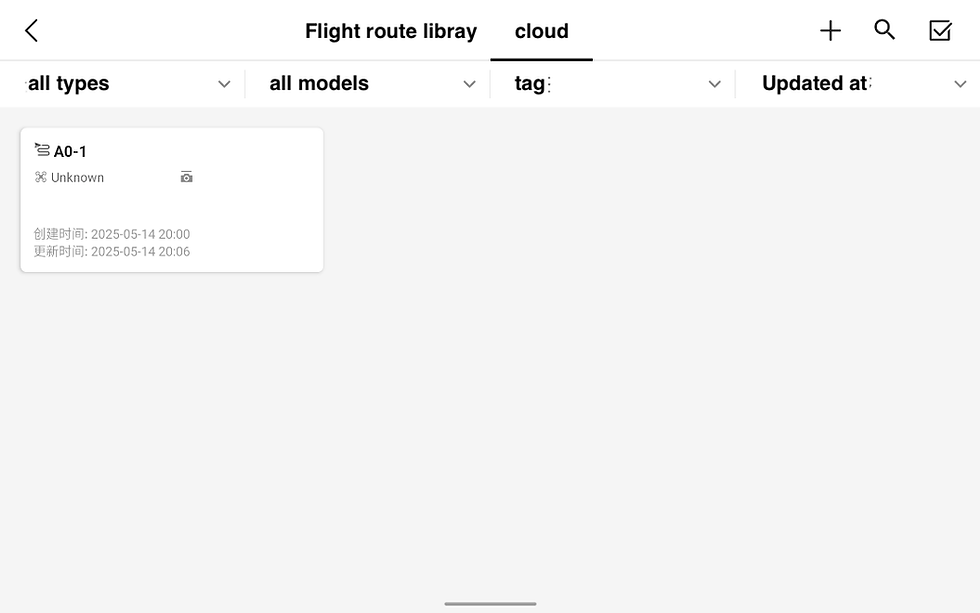
Choose the appropriate flight route from the list and get ready to start the mission.

Step 3: Coordinated Work Among Multiple Teams
Watchout on Ground Control Points, Takeoff/Landing Site Updates, Charging, and Collaborative Flight Operations
Ground Control Point (GCP) Setup: Each team can set up GCPs on-site after arriving at the takeoff location. Choose takeoff sites ideally 300–1000 meters from the flight route’s starting point and ensure they have 4G network coverage.
After completing flights with the first two battery sets, teams can either relocate to a new site to continue work or, while driving to the next takeoff point, simultaneously set up new GCPs and update the return-to-home positions. This method of flying while moving improves operational efficiency.
Charging Recommendations: It’s recommended to use hybrid or fuel-powered vehicles that support 220V high-power discharge, paired with DJI’s vehicle chargers and outdoor power supplies.
During summer operations, after swapping batteries, cool them via an air conditioner vent for 5 minutes before charging to prolong battery life.
Collaborative Operations: Maintain timely communication between teams during joint operations. It’s advised to stagger flight altitudes by 5–10 meters between drones or fly at different times to avoid conflicts. Closely monitor the real-time positions of your own and teammates’ drones, especially near group boundaries, to prevent mid-air collisions.

Group Operations: A single work team can consist of 2 people operating 1 to 4 drones.
Field Experience Summary
From the Phantom 4 RTK, Mavic 3 Enterprise, M300 RTK, M350 RTK to the latest Matrice 4E model, extensive project validations have proven that DJI’s drones offer outstanding operational reliability. With 4 to 5 flight teams equipped with 7 to 8 drones, it’s possible to complete aerial surveys covering thousands of square kilometers within 3 to 5 days. This capability provides efficient data support for projects such as environmental inspections, forestry surveys, agricultural statistics, livestock monitoring, anti-drug patrols, and land investigations.
In plains, hilly, and low mountainous areas, when traffic conditions permit, the Matrice 4E drone can handle overcast and cloudy weather conditions, reliably completing large-scale aerial surveys without concerns about flying through clouds or other atmospheric challenges.
STEP 4: UAV Data Processing
After several days of joint operations by multiple flight teams, tens of thousands to over a hundred thousand photos will be collected. Since the project area is remote, to avoid the extra costs and schedule delays caused by re-flights, it is essential to strictly ensure data quality and completeness.
To this end, DJI Terra Cluster Edition was used to quickly perform quality inspection on the field data. A real-world case showed that processing 24,000 images for 3D modeling took only 20 hours and 38 minutes, significantly improving the efficiency of office-side data processing.
This project utilized the Matrice 4E drone to successfully complete a large-scale aerial survey. DJI is committed to continuously optimizing the entire aerial survey workflow to make large-area mapping smarter and more efficient.


Comments